
I remember the first time I walked up to a functional trainer. It was a rainy Tuesday at my local gym. The place was packed, and the bench press stations were all taken. I looked at the big metal frame in the corner with all its wires and handles. It looked like a giant metal spider web. I was intimidated, but I had to get my workout in. That day changed how I view training forever.
Years later, I now have a dual cable machine setup in my own garage. It is the centerpiece of my home gym. But getting here wasn’t a straight line. I made a lot of mistakes along the way. I used the wrong attachments and set the pulleys at weird heights. I even dropped the weight stack on my finger once. That hurt a lot.
I want to share exactly how I set up my machine. I want to tell you what works and what is a waste of time. This isn’t a manual written by a robot. This is just me telling you what I have learned from sweat and trial and error. If you get the setup right, this machine can do almost anything.
Table of Contents
Why I Moved to the Cables
I used to be a free weight purist. I thought you only needed a barbell and some heavy plates. But my joints started to disagree with me. My elbows would ache after heavy skull crushers. My shoulders clicked when I did wide bench presses. I needed something smoother.
That is the magic of the dual cable machine setup. It provides constant tension. When you lift a dumbbell, the tension changes. At the top of a curl, the dumbbell is easy to hold. With a cable, the weight stack is always trying to pull your arm down. There is no rest at the top. This makes your muscles work harder without needing as much heavy weight.
I also love the freedom of movement. A barbell locks your hands in one spot. If your wrists hurt, too bad. With cables, I can rotate my wrists. I can move my arms in a path that feels natural for my body. It feels safer, and I get a better pump.
The Anatomy of My Machine
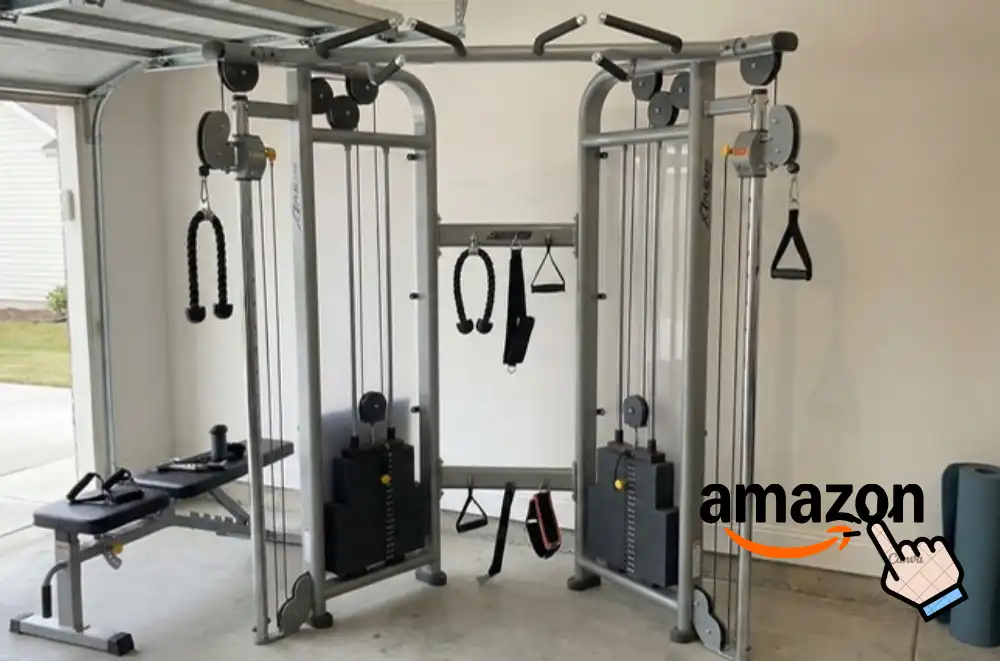
Before we get into exercises, let’s look at the machine itself. Most functional trainers look the same. You have two weight stacks on the sides. You have two columns with pulleys that slide up and down. Finally, you have a bar at the top for pull-ups.
Understanding the pulley ratio is vital. My machine has a 2:1 ratio. This confused me at first. I put the pin in the 50lb plate, but it felt light. A 2:1 ratio means the weight feels like half of what is marked. If I select 50lbs, I am only lifting 25lbs of actual resistance.
This is actually a good thing. It allows for smaller jumps in weight. It also allows the cable to travel faster. You can move quickly without the weight stack jumping up and slamming down. This is great for athletic moves. Just don’t let your ego get hurt when you have to use the whole stack.
My Pulley Ratio Breakdown
| Feature | My Experience | Why It Matters |
|---|---|---|
| Ratio | 2:1 (Common) | Weight moves faster and smoother. |
| Feel | 100lbs feels like 50lbs | Allows for fine-tuning small weight jumps. |
| Cable Length | Extends about 8-10 feet | Lets me walk out for lunges or sprints. |
Setting Up the High Pulley
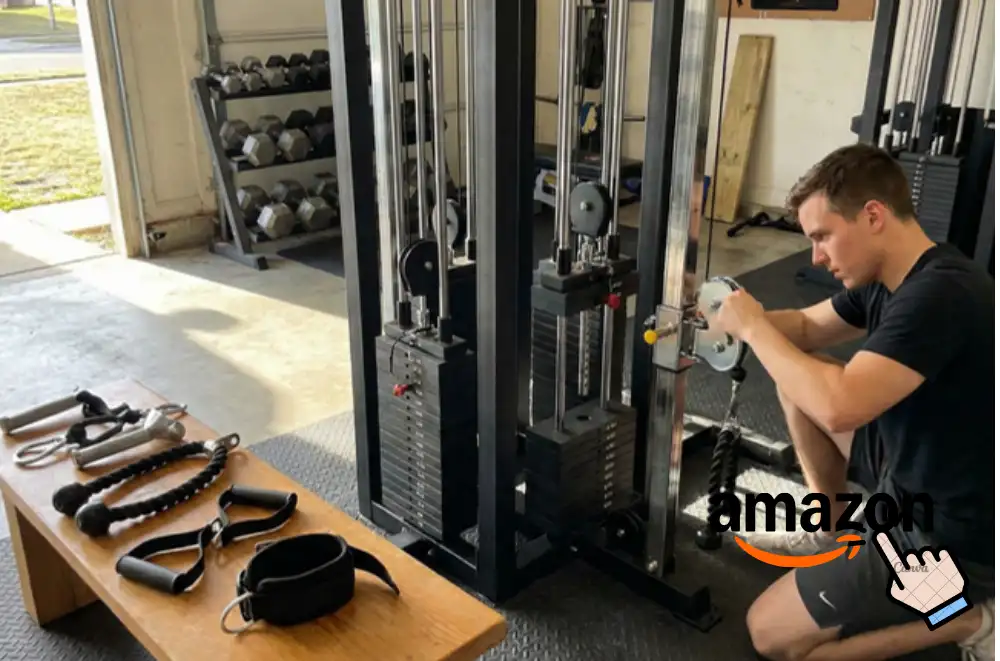
I start most of my workouts with the pulleys set high. To do this, I pull the pop-pin on the sliding carriage. I slide it all the way to the top number. On my machine, this is setting 20. I make sure the pin clicks loudly. You do not want that sliding down while you lift.
The most common move I do here is the face pull. I set the rope attachment on the high pulley. I grab the rope and pull it toward my forehead. This has saved my shoulders. It works the rear delts and helps posture. Since I sit at a desk all day, my shoulders roll forward. This setup pulls them back.
I also use the high setup for triceps. I clip on two single handles, one on each side. I cross the cables in an “X” shape. I hold the left cable in my right hand and the right cable in my left hand. Then I pull down and apart. The “X” setup lines up perfectly with my arm path. It feels much better than using a short bar.
The Mid-Height Setup Strategy
The mid-height setting is tricky. It corresponds to your chest and shoulder level. I use this mostly for pressing and flying motions. I set the pulleys to roughly armpit height. This creates a straight line of force for chest exercises.
The biggest lesson I learned here is about stability. When you push forward, the weight pushes you back. If you stand with your feet together, you will fall over. I learned this the hard way in front of a crowded gym. It was embarrassing.
Now, I always use a staggered stance. I put one foot forward and one foot back. I lean my weight onto the front foot. This braces my body. It turns the chest press into a full-body stability drill. My core has to fire to keep me upright.
Common Mid-Height Exercises
- Standing Chest Press: Like a bench press, but standing up.
- Seated Rows: I put a bench in front of the machine.
- Rotator Cuff Work: I set it to elbow height for warmups.
- Pallof Press: An amazing core move against rotation.
The Low Pulley Setup
Moving the pulleys to the bottom opens up a new world. I slide the carriage down to the last hole. This is where I train legs and biceps. People often forget you can train legs with cables. It is actually very effective.
I use an ankle strap for this. I strap it to my ankle and clip it to the low pulley. Then I can do hamstring curls while standing. I can also do leg extensions to hit the quads. It is not as heavy as a leg press, but the burn is intense.
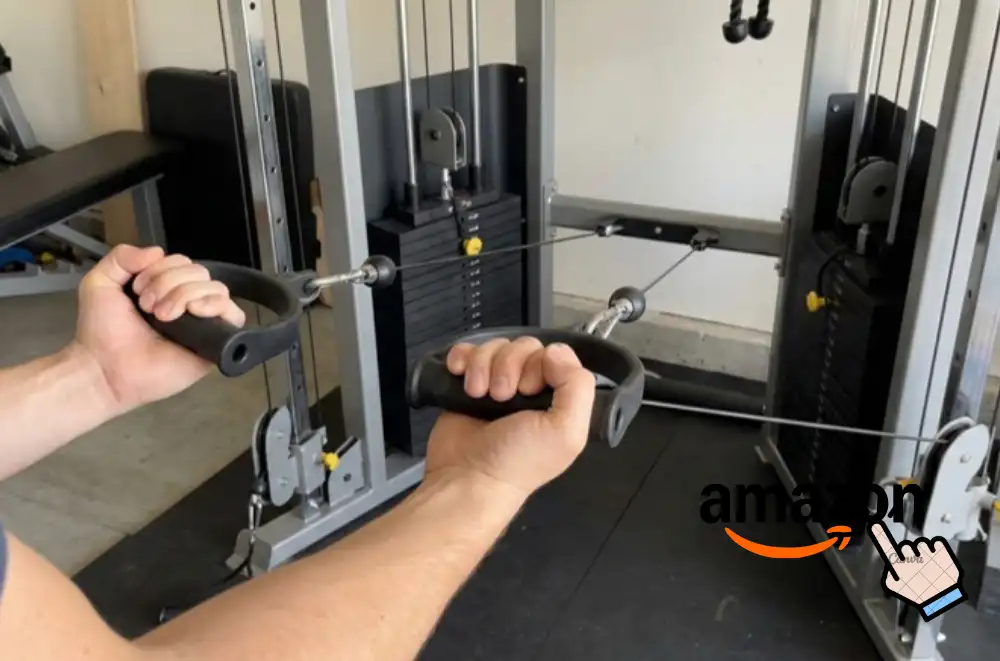
For biceps, the low dual cable machine setup is superior to dumbbells. I stand in the middle and grab a handle in each hand. I step forward just a bit. This puts my arms behind my body. When I curl up, the tension is incredible. The stretch at the bottom is deep. This is called a “Bayesian Curl.” It is my favorite arm builder.
Attachments That Changed My Workout
The generic handles that come with the machine are okay. They are usually made of hard nylon. They can rub against your wrists and cause chafing. I upgraded my attachments quickly. It makes a huge difference in how the lift feels.
I bought a pair of D-handles with rubber grips. They rotate smoothly. This prevents wrist strain. If the handle doesn’t rotate, your wrist gets stuck in bad positions. I also bought a long rope. The standard ropes are too short. A long rope lets me pull my hands further apart.
I also have a straight bar that connects to both sides. This is a game changer. It turns the dual cables into a barbell. I clip the bar to both the left and right pulleys. Now I can do squats or bench presses. The bar is unstable, so it shakes a little. This forces my stabilizer muscles to wake up.
Attachment Ratings
| Attachment | Usage Frequency | My Verdict |
|---|---|---|
| Nylon D-Handles | Rare | Too rough on the hands. Replace them. |
| Long Rope | Daily | Great for triceps and face pulls. |
| Ankle Strap | Weekly | Essential for leg day isolation. |
| Connecting Bar | Weekly | Fun for squats, but takes time to set up. |
Dealing with Friction and Maintenance
A dual cable machine setup needs love. After about six months, my cables started to feel “sticky.” I would pull, and it would stutter. It wasn’t a smooth glide anymore. I thought I broke it.
I realized I needed to clean the guide rods. These are the chrome poles the weights slide on. Dust and sweat settle on them. I wiped them down with a rag and some silicone spray. Do not use oil or grease. Oil attracts dust and makes a black sludge. Silicone dries clean.
Now, I wipe the rods down every Sunday. It takes two minutes. The weights glide like they are floating on air. I also check the cables for fraying. If the plastic coating on the wire cracks, replace it immediately. A snapped cable is very dangerous.
Advanced Techniques I Use
Once I got comfortable, I started experimenting. One of my favorite methods is the “drop set.” With dumbbells, drop sets are annoying. You have to put the weights down and pick up new ones. With the dual cable machine setup, it is instant.
I do a set of flys until I can’t do anymore. Then I reach back and move the pin up one plate. I keep going immediately. The burn is painful but good. I can strip the weight down five times in one minute.
I also like doing “unilateral” work. This means using one side at a time. I set up for a one-arm row. I hold the machine frame with my free hand. This lets me pull much heavier weight. It fixes muscle imbalances. My left side is weaker, so I do extra reps on that side.
Mistakes I Want You to Avoid
I wasted a lot of time doing things wrong. One major error was setting the cables too wide. My machine has a wide setting and a narrow setting. For a long time, I did everything on the wide setting.
For pressing, wide is okay. But for tricep pushdowns, wide is bad. The cable rubs against your shoulders. It creates friction and hurts your skin. If you are doing close-body work, keep the pulleys narrow.
Another mistake was letting the weights slam. I used to let the stack drop at the bottom of the rep. This creates slack in the cable. When you pull again, it jerks your joints. You must control the weight all the way down. Stop just an inch before the stack touches. This keeps the tension on the muscle, not the joint.
My Final Thoughts on the Setup
Setting up a dual cable machine can seem like a chore. There are pins to pull and handles to clip. It is faster to just grab a dumbbell. But the results are worth the extra minute of setup. My joints feel healthier than they did five years ago. My muscles look fuller because of the constant tension.
If you have access to one, don’t be scared of it. Start with the handles at chest height. Do some presses. Then move them down and do some curls. Play with the height adjustments. You will find the sweet spots that fit your body.
It is a tool that grows with you. I am still finding new ways to use it. Just last week, I learned a new way to train my abs with it. That is the beauty of the cable machine. It is as versatile as your imagination allows.
FAQ: Dual Cable Machine Setup
Q: How do I keep the weight stack sliding smoothly?
Wipe the chrome rods with a rag and pure silicone spray monthly. Never use heavy oil or grease, as they trap dust. This keeps your dual cable machine setup smooth.
Q: How often should I check the cables for wear?
Check the coating on your dual cable machine setup weekly. If you see cracks or bare wire, replace the line now. A snapped cable causes injury and ruins the workout.
Q: What tools do I need to assemble or fix a cable machine?
You mostly need a socket set and a few open-ended wrenches. A rubber mallet helps tap the frame into place. Keep hex keys handy to tighten any loose pulley bolts.
Q: Why does one side of my machine feel heavier?
Your floor might be uneven, which causes drag on the rods. Check the feet under the frame. Adjust them until the dual cable machine setup sits flat and true.
Q: Can I use standard carabiners for attachments?
Yes, but make sure they are rated for heavy gym loads. Cheap clips can snap under high tension. Heavy steel links keep the handle locked to the cable safely.