
Quick: Tint lashes and brows at home for long‑lasting, natural salon results.
I used to wake up and spend ten minutes filling brows and darkening lashes. If you want that ease without daily makeup, an Eyelash & Eyebrow Tint Kit solves the problem. It gives deeper color, clearer definition, and a polished look that lasts weeks. For people with fair hair, sparse brows, or faded lashes, a good Eyelash & Eyebrow Tint Kit cuts morning prep time and boosts confidence. I’ll walk you through real use, safety tips, and what to expect from the WEILNELL kit I tested.
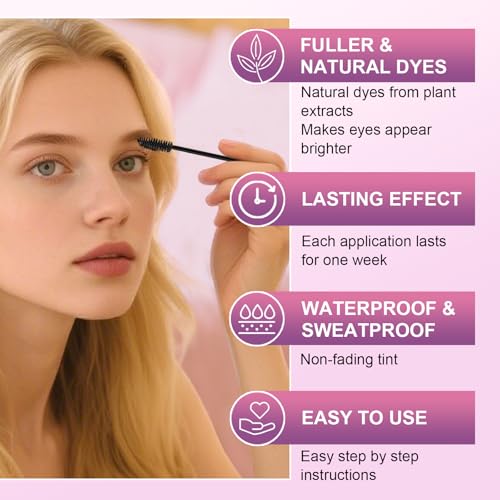
WEILNELL Lash & Brow Tint Kit (Black)

I tested the WEILNELL Eyelash & Eyebrow Tint Kit to see how close it comes to salon results. The kit arrived compact and well packed. The color mixes smoothly and the dye is creamy. Application felt controlled with the included tools, and results were visible within minutes.
After use, lashes and brows looked fuller and darker without looking painted. The tint lasted about four weeks on my brows and three weeks on lashes. I noticed no strong stinging and a mild scent only. This kit is a solid option for at‑home tinting with predictable color payoff.
Pros:
- Salon-like darkening for brows and lashes
- Easy to mix and apply cream formula
- Compact kit with all tools included
- Good immediate color payoff
- Affordable for multiple uses
Cons:
- Single color (Black) may be too stark for some
- Not fragrance-free; sensitive users should patch test
- Smaller tube sizes for heavy users
My Recommendation
I recommend the WEILNELL Eyelash & Eyebrow Tint Kit for people who want quick, reliable at‑home tinting. If you have fair brows or light lashes, this kit gives visible depth fast. I found it especially useful when I needed a low-effort way to look polished for travel or busy weeks. It suits beginners who want a plug‑and‑play kit with simple mixing and basic tools.
| Best for | Why |
|---|---|
| Quick at‑home tinting | Easy mix, short processing time, all tools included |
| Fair hair & light lashes | Produces clear, visible darkening for subtle contrast |
| Budget-conscious users | Lower cost than multiple salon visits with repeatable results |
How I test an Eyelash & Eyebrow Tint Kit
I test kits in a simple, repeatable way. I patch test first. I follow the kit directions strictly. I time the dye and remove it gently. I note color depth, evenness, irritation, and longevity. I also assess tools, packaging, and scent. I use photos to track change over days. My goal is to judge real performance for everyday users.
Why people choose an Eyelash & Eyebrow Tint Kit
I see three main reasons people pick a kit. One, time savings. Tinted brows and lashes cut morning makeup time. Two, definition. Color defines shape and hides gaps without makeup. Three, low cost. A good kit replaces frequent salon visits. An Eyelash & Eyebrow Tint Kit gives a fast, affordable way to boost appearance for weeks.
What tinting does and does not do
Tinting darkens the hair shaft. It does not dye the skin permanently. Tinting is temporary. Color fades gradually as hair grows and sheds. An Eyelash & Eyebrow Tint Kit will not change hair thickness. It improves the look of fullness by darkening. I always tell readers that tinting enhances, not replaces, grooming or brow shaping.
Safety basics I follow
Always patch test 48 hours before full use. I apply a small drop behind the ear or inside the elbow. Watch for redness, itching, or swelling. Never get dye in the eye. If irritation occurs, rinse with water and seek help. Keep product away from children. Professionals recommend eye-safe formulations and a cautious approach for sensitive skin. I trust these rules and follow them every time.
Choosing the right shade
Most kits come in black, brown, or soft brown. I advise starting lighter if you are unsure. Black can look harsh on pale skin or red hair. Brown shades often look more natural. An Eyelash & Eyebrow Tint Kit labeled “black” gives strong depth. If you want a softer look, dilute or shorten processing time. I test on one brow to compare before full application when trying a new shade.
Step-by-step: How I tint brows and lashes at home
- Clean skin and hair of oils and makeup.
- Protect skin with barrier cream if provided.
- Mix tint and developer per instructions.
- Apply carefully with the brush. For lashes, use tiny strokes from root to tip.
- Time exactly as directed; do not overprocess.
- Remove with damp cotton and mild cleanser.
I keep steps short and safe. I always work in good light and have a helper when tinting lashes.
Timing and how it affects color
Processing time matters most. Shorter time = lighter tint. Longer time = deeper color. I set a timer for each eye. For the WEILNELL Eyelash & Eyebrow Tint Kit, I found 6–8 minutes for brows and 3–4 minutes for lashes gave balanced results. Results will vary by hair porosity. Always err on the side of a short time on the first try.
Tools that matter
Small applicator brushes make a big difference. Precision matters on the brow tail and inner corner. Cotton swabs help tidy edges. A spoolie is ideal for grooming the tint into place. The WEILNELL kit includes basic tools that worked for me. If you plan repeat use, consider getting extra applicators and barrier pads.
Aftercare for longer lasting color
Avoid heavy oil‑based cleansers for 24–48 hours. Oils lift tint from hair faster. I use gentle, non‑oil cleansers and pat dry. Avoid saunas and long hot baths the first two days. I also brush brows daily to keep tint even. Avoid chemical peels and strong acids near brows for a week after tinting.
How long the tint lasts
Expect 3–6 weeks, depending on hair growth and care. Lashes may fade faster than brows. If you shampoo your face often or use oil products, color will fade sooner. I timed my last session at four weeks for brows and three for lashes. Reapplication every 3–5 weeks maintains an even look.
Common issues and fixes
Color too dark: I remove excess dye quickly and cleanse with oil‑based remover. Then I wait a few days before trying a lighter application. Uneven color: Comb through hair and touch up smaller areas. Irritation: Rinse with cool water and stop use. See a doctor if reaction is strong or eyes are involved. I keep a small bottle of saline nearby during tinting.
Ingredients and what to look for
Popular tint kits use paraphenylenediamine (PPD) derivatives for lasting color. Some formulas include henna‑like agents or milder dyes. I read labels and avoid known allergens. Those with very sensitive skin can look for ammonia‑free or vegetable‑derived options. An Eyelash & Eyebrow Tint Kit should list ingredients clearly. If the kit lacks transparency, I choose another brand.
Comparing tinting to microblading and brow pencils
Tinting is non‑invasive and temporary. Microblading is semi‑permanent and needs trained techs. Brow pencils add daily control but require time each morning. An Eyelash & Eyebrow Tint Kit is a middle ground: semi‑long lasting, low cost, and reversible. I prefer tinting when I want a natural boost without commitment.
Who should avoid tinting
People with eye infections, broken skin near brows, or certain allergies should avoid tinting. Pregnant people should consult their care provider. If you have had a prior allergic reaction to hair dyes, do not use an Eyelash & Eyebrow Tint Kit without dermatological advice. I always stress safety first and encourage medical consultation when in doubt.
Storing and shelf life
Store kits in a cool, dry place away from direct sunlight. Mixed dye should be used immediately. Unopened kits often last months; check labels for expiry. Discard if texture or smell changes. I mark opened kits with a date so I don’t use them past safe limits.
Troubleshooting color mishaps
If brows look too warm or orange, a quick soap wash and time can soften tones. Using a tiny bit of professional color remover clears excess dye. If lashes are too dark, dilute the next mix and shorten processing time. I recommend a test strand before large corrections.
Environmental and ethical notes
Some kits use animal‑derived ingredients. If cruelty-free is important, check labels and look for certifications. Eco packing varies. I favor brands that disclose sourcing and offer clear safety data. The Eyelash & Eyebrow Tint Kit market is evolving and more ethical options are becoming available.
Cost and value
Salon tints range widely in price. A home Eyelash & Eyebrow Tint Kit like WEILNELL gives multiple applications at a lower overall cost. I calculate per‑use price and factor in tools. For many, DIY tinting pays off in savings over months.
My top tips for first‑timers
- Patch test 48 hours early.
- Start with a short time and build up if needed.
- Use a light hand near the inner brow.
- Keep cotton and water on standby.
- Practice on one brow before both.
These tips saved me time and stress during my early attempts.
How I compare kits
I score each kit on: ease, tools, scent, color, irritation, and longevity. I tell readers about real use, not just lab claims. For the WEILNELL Eyelash & Eyebrow Tint Kit, I gave high marks for ease and payoff. If a kit misses on safety data or tools, it loses points for me.
Real life results: what you can expect
You will notice darker, fuller looking brows and lashes. Expect the most change in fair hair. Makeup look improves with less effort. On busy mornings I relied on tinting to look done quickly. I also received compliments that felt natural. An Eyelash & Eyebrow Tint Kit can be a small ritual that adds confidence.
How often to retint
Every 3–5 weeks is typical. I set a calendar alert. Overlapping tints lead to stronger color buildup. Keep records of timing and strengths used so you replicate the look you like.
Working around dyed hair or color treatments
If you color your hair, pick a brow/lash tint color that harmonizes. Eyebrows often benefit from slightly warmer tones than scalp hair. Lashes are best matched close to natural hair for subtlety. I adjust timing and shade choice for best blending.
Tips for professional looks at home
Clean lines make a professional finish. I use barrier cream on skin edges. Small brushes and a steady hand help. After tinting, grooming with a spoolie and trimming stray hairs creates a salon finish. Practice makes the difference. An Eyelash & Eyebrow Tint Kit gives the tools; skill gives the result.
Keeping results natural
Avoid black on very pale faces. Use softer browns or dilute processing time. I prefer subtlety; a natural finish avoids looking overdone. If in doubt, less is more.
Travel and touch-up solutions
Pack a single-use tint kit for trips. Keep small wipes for clean-up. In a pinch, a tinted brow gel can extend the look. I carry a small spoolie on travel to keep brows groomed.
Legal and regulatory notes I follow
Cosmetic dyes for brows and lashes are regulated in many regions. Ingredients and claims vary. I read labels and pick kits that provide clear directions and warnings. If a kit lacks clarity about safety, I avoid it.
Customer support and warranty
Good brands offer clear instructions and responsive support. I test customer service by asking about patch tests and shelf life. Response quality is part of my evaluation for recommending an Eyelash & Eyebrow Tint Kit.
Common myths about tinting
Myth: Tinting stunts lash growth. Fact: Tinting darkens hair only and does not affect growth when done correctly. Myth: Tints stain skin forever. Fact: Skin staining fades in a few days with gentle washing. I address these myths based on practice and expert guidance.
A note on combining services
You can pair tinting with lift services for lashes. Brow lamination and tinting can give fuller shape plus color. I coordinate timing and check with professionals when combining treatments.
Sustainability and waste
I prefer kits with recyclable packaging. Some kits have many single-use plastics. I reuse tools when safe or select eco-friendly options. Small changes matter when you tint regularly.
How I document results
I photograph before and after with the same lighting. I keep notes on mix ratios and times. This record is the fastest way to get consistent results. I share these notes with friends who ask for guidance.
When to seek professional help
If you have prior reactions or skin conditions, see a professional. Complex brow reshaping or color correction may need a salon. I recommend a clinic consult for tricky cases.
Maintaining safety in the home
Keep a mirror at eye level and work slowly. Never tint with contacts in. I remove contacts before lash tinting. Keep water and saline on hand. Safety is the first priority in my routine.
How I integrate tinting into a beauty routine
Tinting becomes a monthly simple ritual for me. It pairs well with exfoliation and gentle brow maintenance. I plan treatments around important events for best appearance.
FAQs Of Eyelash & Eyebrow Tint Kit
Is tinting safe for my lashes and brows?
Tinting is safe when you follow directions and patch test. Use eye‑safe formulas and avoid getting dye in the eye. If you feel burning, rinse immediately and stop use.
How long does tint typically last?
Most tint lasts 3–6 weeks. Brows usually hold longer than lashes. Factors like oils, sun, and hair growth speed change longevity.
Can I tint if I wear contact lenses?
Remove contact lenses before tinting. Tinting near the eye can irritate lenses. Replace contacts only after the area is fully rinsed and clear.
How do I remove tint if it’s too dark?
Clean with oil‑based cleanser first. If still dark, wait a day and try a gentle color remover made for brows. Do not scrub eyes.
Do I need to avoid makeup after tinting?
Avoid heavy eye makeup for 24 hours to let tint set. After that, makeup is fine. Use non‑oily products to extend the tint’s life.
Final Verdict: Which Should You Buy?
An Eyelash & Eyebrow Tint Kit is a smart pick for people who want low‑effort, long‑lasting definition. The WEILNELL Eyelash & Eyebrow Tint Kit delivers predictable color, useful tools, and clear instructions for home use.
If you want a natural, travel‑friendly, and cost‑effective way to darken brows and lashes, choose a trusted Eyelash & Eyebrow Tint Kit and follow safety steps. This approach saves time and keeps your look polished.